")
Sub-Total: $0.00
6 Range Techniques to Practice for Success In the Field
Work on these techniques while at the range to be a better marksman, and maybe even a better hunter.
by HEIDI LYN RAO posted on November 10, 2021
Going to the gun range prior to hunting season can dramatically increase your odds of success. There are things you can work on while at the range that will make you a better marksman, which can lead to being a better hunter.
Regardless of his or her chosen sport, the first thing that every responsible shooter should do is take an NRA Firearms Training course. Whether you are a beginner or a seasoned marksman, it is always beneficial to refresh yourself with the basics and fundamentals of shooting. Taking an NRA course will get you headed in the right direction in becoming a successful hunter. Second, go to the gun range to master six techniques that will help you become a better hunter.
1. Breath Control
Breath control is one of the first things a new or inexperienced shooter needs to master. We are living, breathing beings with a heartbeat. We are designed to move, and when still, it is impossible to eliminate all movement. Try this: Clap your hands together and extend your arms in front of you. Hold your breath. You will notice that you will have some movement, even small movement, and will not be able to remain motionless. Holding your breath too long will result in muscle tremors and fatigue. Next, begin breathing normally. Watch your hands rise and fall with each breath you take.
This is easy to see when instructing new students. When many of my first-time students shoot, there is a distinct rise and fall of the shots on paper. I reinforce the “clapped hand extended in front of them†exercise and they almost always understand what they are doing wrong. This is one of the easiest problems to correct if you show them instead of only telling them that they do not have proper breathing control.
Proper breath control should be smooth and deliberate. Once you obtain a proper sight picture, you should smoothly exhale. When your exhale is at its bottom of its path, you should briefly hold your breathing and squeeze the trigger. If at any point in your breathing you lose your sight picture, start over. Do not rush the shot or shoot with a bad sight picture.
Rushing your shot or shooting with an improper sight picture could result in a bad outcome. At minimum you just miss your target. A worse situation could result in a wounded animal. A disastrous situation could result in serious bodily injury or worse, when your bullet accidently hits an unintended target.
2. The Free-Hand Dilemma
Many shooters do not know what to do with their free, or non-dominant, hand. I have seen individuals place the palm of their free hand on the barrel or on the scope. When this is done, there is normally downward pressure on the part of the firearm where the palm is placed. When this occurs, it can affect bullet placement, resulting in missing your target or wounding an animal.
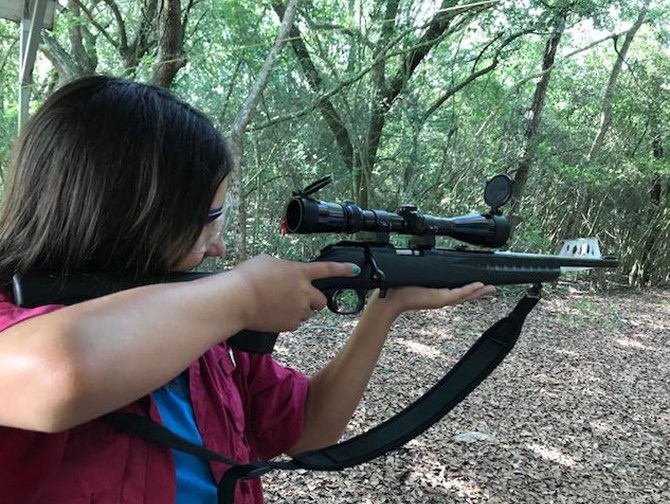
Get that hand out of the way! If you are properly holding your firearm, your free hand is not needed. While shooting at the range, from a benchrest position, your free hand should be placed, palm down, under the wrist of your shooting hand. Your shooting hand wrist does not have to rest on your freehand. This is only a place to get the free hand out of the way.
Some individuals want to put their free hand, palm up, on the forestock of the gun. This position is acceptable if you do not apply pressure. Gripping the forestock with your free hand can also affect bullet placement. The forestock of the firearm is used only for support. This is done by resting the forestock on sandbags or your open palm. Just remember, if you wrap your fingers around the forestock, it should be a loose grip.
3. Shoulder-Cheek Weld
Many times, new or inexperienced shooters are reluctant to get a firm shoulder and cheek weld on their firearm, usually fearing the recoil. What they are actually doing is making the recoil much worse. If the butt of the rifle is not firmly seated in the shoulder pocket, the rifle will kick back, potentially hurting the shoulder. If this is not corrected, the individual will develop a “flinch†when pulling the trigger. This causes the shooter to throw the shot, which results in missing the target.
With the proper shoulder and cheek weld, the shooter can reduce recoil while giving the firearm a firm base to properly function. You should firmly pull the butt of the rifle into the soft spot between your shoulder and collarbone, just above the breast. Your cheek should rest on the stock of the firearm that allows for the proper sight picture. Some stocks have a raised comb, which provides for a better cheek weld.
When you pull your rifle tightly into your shoulder and firmly rest your cheek bone on your stock, you can provide a solid base for your rifle. A proper shoulder and cheek weld can provide as stable a shooting base as a gun vise.
4. Benchrest Blunders
The most common mistake I see at the gun range is how new or inexperienced shooters place his or her rifle on the firearm supports or rests. These supports include sandbags, gun vises and stands. The rifle should be supported on the forestock or fore-end. The rifle should never be supported by placing the barrel on support devices.
Most barrels are free floating. This means that the forward part of the stock does not come in contact with the barrel. To check this, take a dollar bill or piece of paper. Make a “U†with the paper and slide it towards the trigger between the barrel and the fore stock. It should slide smoothly until it hits the receiver of the firearm.
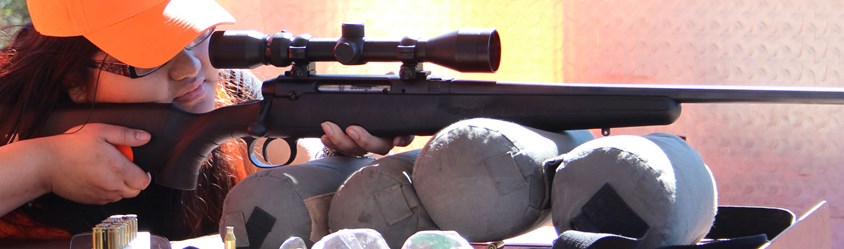
By (incorrectly) resting the barrel on the support device, you are affecting the point of impact of the bullet. Follow the proper NRA Shooting Fundamentals and support the firearm by the rifle’s forestock. Practicing the correct shooting position while at the range can prevent you from inadvertently resting your barrel on the windowsill of your blind, the fork in a tree, or any other rest when in the field.
Other easily corrected errors include having the rifle too high, too low, too close to the shooter or too far from the shooter. When one of these things occurs, the new or inexperienced shooter contorts his or her body to obtain a proper sight picture. The shooter must bring the rifle to him or her, not bring themselves to the gun. This will help to quickly get into a proper shooting position in the field.
5. Eye on the Prize
Keeping your eye on the “prizeâ€â€”the target—will help you hit the spot at which you are aiming. This can be referred to as “follow through.†Without follow through, you never complete your shot. Follow through makes it possible for quick follow-up shots. Too often inexperienced shooters or those that have never learned proper shooting techniques are more interested in seeing if he or she hit their target instead of seeing if a follow-up shot is necessary.
When shooters intentionally lose their sight picture by raising their head off the stock of their long-arm, or looking over a handgun’s sights, they are demonstrating their confidence. They are demonstrating that they do not have much confidence in their shooting skills. Many shooters that fail to properly follow through their shots actually start to raise their head or drop their sight picture before they even finish squeezing the trigger! When you are confident in your shooting ability, you do not need to look to see if you hit the target. You know you did!
Follow through is slightly different between rifle, handguns and shotguns. When shooting a rifle, regardless if you are aiming with open sights, peep sights or a scope, follow through keeps the shooter on target. When hunting, this serves two purposes. First it completes the shot, and second it keeps your rifle on target in case a follow-up shot is necessary.
When shooting handguns, keeping the firearm on target is also very important for follow-up shots if it is used for hunting. Follow-up is especially important when practicing with guns used for self-defense. Quick follow-up shots are very important if the game you are hunting does not go down immediately or in the case of self-defense, if the threat does not cease. Getting this technique down can put game in your freezer or save your life.
Follow through is completely and 180 degrees the opposite when shooting shotguns! Shotguns are normally used on moving targets. Instead of staying on target, you swing through your target. If you stop the shotgun’s travel as soon as you slap the trigger, your shot will almost always be behind the moving target. This also sets up the follow-up shot because you are already ahead of the target.
6. Two Rounds
This is one of the most overlooked concepts in hunting. There should be a minimum of two rounds in any firearm used for hunting. Once a shot is fired, the shooter, while keeping his or her target in view (= follow through), needs to cycle a new cartridge or shell into the chamber. This cycling of ammunition through the firearm can be done manually as in a bolt-action rifle, or on its own such as in a semi-automatic shotgun. If a follow-up shot is not necessary, then the shooter should either place the safety in the “on†position or unload, leaving the action open to display a safe firearm.
First-time hunters need to be taught the importance of employing proper shooting techniques when hunting. This includes obtaining the proper sight picture, proper breath control, squeezing the trigger, keeping the firearm on target while cycling a new round into the chamber, and then taking a follow-up shot if necessary. Practice these range techniques and when you are in the field, watch your shooting proficiency increase!